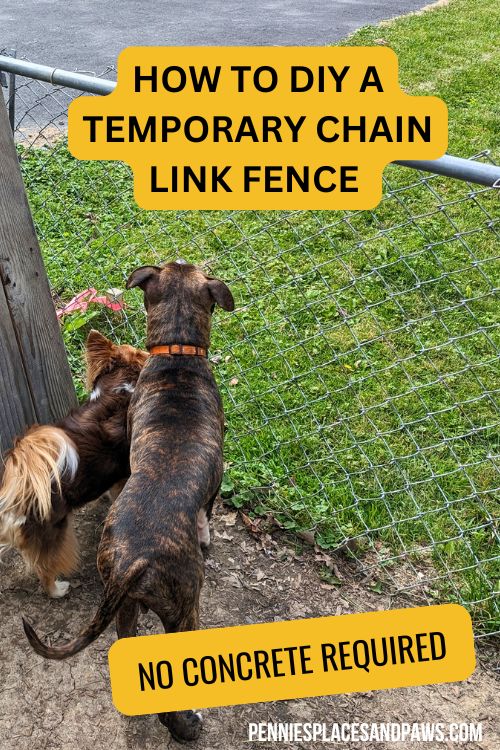
How to DIY a Temporary Chain Link Fence (No Concrete Required)
Are you looking for an affordable, secure fence option that won’t permanently damage your property? This is a common issue for pet owners who rent and own their land. Permanent fences are expensive and usually require permits from the city and permission from your HOA or landlord.
If you need a flexible and economical option for your yard or pets because you are saving money for a permanent fix or you’re renting, a temporary chain link fence might be the perfect answer! A traditional chain link fence requires digging deep holes and concrete footings for the posts but our method requires neither.

In fact, we set up and took down our temporary fence in just a few hours. After removal, the only evidence left behind were small 1-2” holes in the ground. Get ready to be amazed at how easy installing sturdy temporary chain link fencing can be!
Temporary Chain Link Fence Materials
Installing temporary chain link fencing is wonderfully easy and requires surprisingly few tools. The basic materials you will need for your new fence will be:
- Metal fence posts
- Rebar (approx 5′ long)
- Top Rail
- Chain link panels or mesh fabric
- Fence clips
- Hog Links
- Post caps
- Tension Band (optional)
- Gate (optional)
- Cinder blocks (optional)
- Mallet
- Wire Cutters
- Wrench (optional)
- Saw (hack saw or reciprocating saw with metal cutting blades)
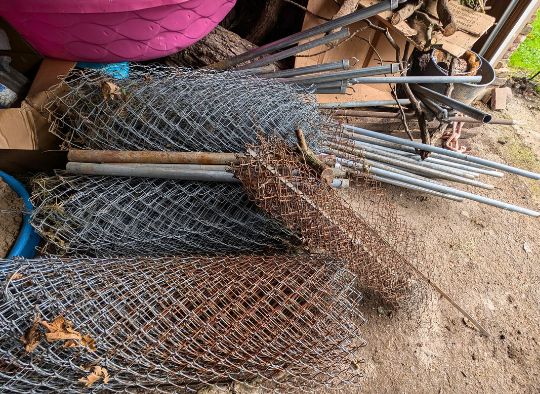
You can find these fencing products in most hardware stores. To save the most money, I’d also look for people trying to get rid of their older galvanized chain link fence on sites like Craigslist or Facebook Marketplace. You could also reach out to companies that install fences. Part of their job is ripping out old fences, and most either throw them out or give the metal to scrappers so they don’t have to pay disposal fees. We used our old chain link fence after we ripped it out.
Prepping for Your DIY Temporary Chain Link Fence
Before you install your temporary fence, there are several important steps you need to take in order for the project to go smoothly:
- Call 811 to see where any electrical, gas, or pipes may be so you know where you can safely install the posts.
- Map out and measure where you want your fence perimeter to be. Don’t forget the gate so you can access the area to mow or other activities.
- Mark where your posts and gate will be.
- Gather materials
How to Install a Temporary Chainlink Fence
Once you’ve finished gathering your materials and mapping out where your temporary chain link fence will go, it’s time to get to work and install it. Don’t worry, these steps are surprisingly quick and easy:
- Prepare your posts. They can be PVC or metal posts. Make sure you cut the posts to the correct size. They need to be big enough to be connected properly to the chain link mesh with an extra inch or two to be hammered into the ground.
- Double-check the position of your posts will be. They must be in a straight line because the top rail needs to go through the caps.
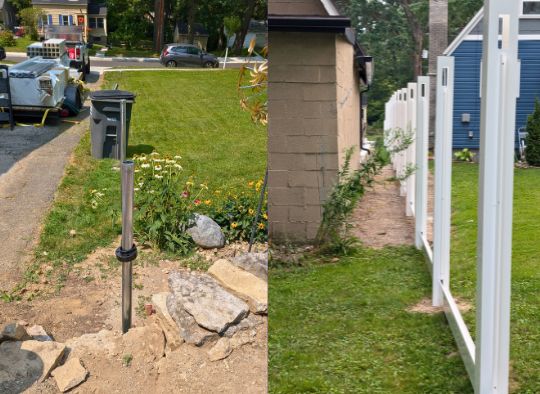
- Hammer your rebar about a foot into the ground where each post will be. The fence post will be slid over the rebar and hammered into the ground 1-2 inches. The rebar is what supports the posts and the entire fence. You may need to slightly adjust your post placement to avoid large rocks or roots underground.
- Once rebar and posts are in the ground, install the caps and then the top rail.
- Once the top rail is in, it’s time to attach the gates and chain link mesh with your fence clips or hog links.
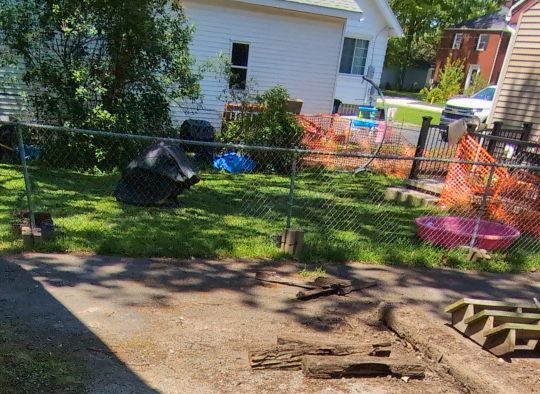
- Check your fence for any weak spots or openings and reinforce where needed.
If you have any doubts that this method could provide a decently stable fence, it’s remarkably similar to how a professional fence company installed our new permanent vinyl fence.
Supporting Your Temporary Chain Link Fence
Once your fence is installed, the work isn’t done. You still need to maintain it. This is especially important for temporary fences. Since the posts aren’t concreted in the ground, you’ll need to regularly check for stability and make any necessary adjustments.
Here are some helpful tips to improve the stability of your fence and increase its lifespan:
- Shorten the space between your fence posts. More posts = more stability.
- Use longer rebar for the posts. The deeper in the ground you put the rebar, the more stability it will have.
- Add cinder blocks on both sides of the posts.
- Avoid leaning on it. Additional weight can slowly loosen the rebar that’s stationed in the ground.
How to Remove Your Temporary Chain Link Fence
Taking a temporary chain link fence down is even easier than putting it up. You just need to:
- Disconnect all clips or hogties.
- Remove the top rail.
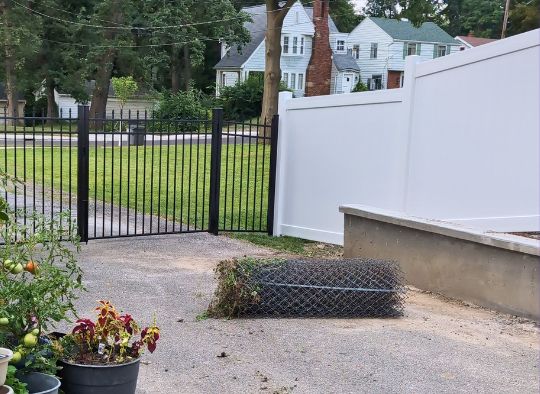
- Roll up your chain link mesh.
- Remove posts.
- Remove rebar.
- Store fence materials in a waterproof area to cut down on rust.
- Fill holes if desired.
Safety and Troubleshooting Your Temporary Chain Link Fence
No matter what kind of fence you are installing, there will always be challenges to making sure it’s safe and secure so you can use it with confidence. Here are a few things to keep in mind before you commit to this project:
- Be wary of using with larger dogs that fence fight or animals that can climb, jump on or over fences.
- Check your fence perimeter more often in areas that flood or get frequent rain. These safety checks are for loose posts, weak spots, or gaps.
- Double-check your zoning laws before you install the fence to avoid penalties or fees.
- You may have trouble with your fence installation if the ground has a lot of rocks or roots. This may require heavier duty equipment to break through the objects in your way.
- If you don’t have an official chainlink gate, you can make your own using PVC as the frame or metal posts.
If installing a temporary chain link fence doesn’t work for your current situation, take a look at these other temporary fence solutions.
DIY Temporary Chain Link Fence: Professional Results Without the Permanent Commitment
A temporary chain link fence was the perfect affordable, hassle-free option for our yard while we waited more than two months for our new vinyl fence to be installed. It provided the security we needed for our dogs to play outside safely without the high cost or permanent changes a traditional fence would need. When we were ready to remove it, the process was even more simple than the install and only left behind small holes that were barely noticeable.
So, whether you’re a renter, waiting for a permanent fence, or just need a quick and reliable option, this DIY is a lifesaver. Give it a try—you’ll be surprised at how easy and effective it is!
Pin For Later:


Good idea for a temporary chain link fence. Good to know that you can set one up in such a short amount of time to keep your pups safe. Excellent troubleshooting and what to look out for with call 811, HOA, and your landlord. I’m certain this will help a lot of folks. I’m sharing with all my dog parents.
Thanks! I’m about to put some up so I can seed large sections of the lawn again. Hope it helps your people 🙂
You need to make this a booklet. It is brilliant for anyone who needs that fence up Right NOW!! I would never manage this without this kind of help!
We learned to be creative with what we had as zoo keepers. It’s helped a lot with using our imagination to come up with solutions- short and long term. Glad to help others who need budget-friendly and quick fence help!
Such a great post! It’s good to know there are options such as temp fence. I’m Pinning this to share!