Homemade Dog Popsicles: Summer Fun for Your Furry Friend
As an Amazon Associate, I earn from qualifying purchases. We may receive a commission for purchases made through these links. This site also contains affiliate links to products besides Amazon, like Etsy. We may receive a commission for purchases made through those links too (at no additional cost to you).
DIY Frozen Dog Treats
There is no better time to start using pet enrichment to help keep your pup cool and comfortable than during the heat of the summer. Though pools and water games and toys are great, making frozen treats for dogs is one of the easiest ways to make sure they are hydrated and entertained! Keep these homemade dog popsicles in the freezer for extra hot days, special occasions, or just for fun!
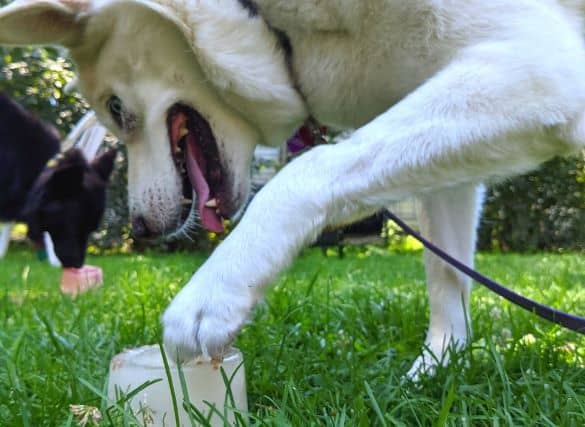
How to Make Frozen Treats for Dogs
I love making my own DIY frozen dog treats because it is so unbelievably easy and versatile. I’ve broken down the process into 6 easy and basic steps that anyone can do and that leaves plenty of room to put your own unique and loving touch into it.
From changing the shape and size to mixing up the flavors and adding surprise toys or treats inside, there is no end to the creative options you will have to make a dog popsicle that your pup will love.
If you love spoiling your dog with special treats like doggie ice cream, or dog sushi, check out our guide to food enrichment for dogs.
Step 1: Decide the Goal of Your Homemade Dog Popsicles
Before you get started creating your icy masterpieces, you will want to decide what type and size of frozen dog treats you want to make. Once you figure out what the goal of your dog popsicles will be, it will be easier to select the ingredients and containers you will need to create them.
Now, I know it may seem weird to set a goal for a treat, so here’s a couple of questions to help you out:
- Did you want this frozen dog treat to keep your pup occupied for a while?
- Are you using these dog popsicles to help keep your dog cool and hydrated?
- Are you making these cold ice treats for a special occasion?
After you decide your primary goals for your frozen food enrichment, it’s time to make a list of everything you will need to make the treats. You’ll need to decide what containers or forms to use, the main ‘flavor base’ of your popsicle, as well as any special additions you may want to add. This could be toys, treats, layers, or even colors.
Step 2: Choosing Containers for Your Frozen Dog Treats
One of the most important steps in making frozen treats for your pup is picking the right container. The first thing you’ll need to do before you get started is to find out how much freezer space you have available. You can’t make frozen treats if you can’t freeze them!
As long as you have enough freezer space, you can move on to selecting the best container or mold to make your dog’s popsicles. Use any food-safe container to make your ice treats in. This could be ice cube trays and molds, Tupperware, kongs, or even leftover yogurt and ice cream containers.
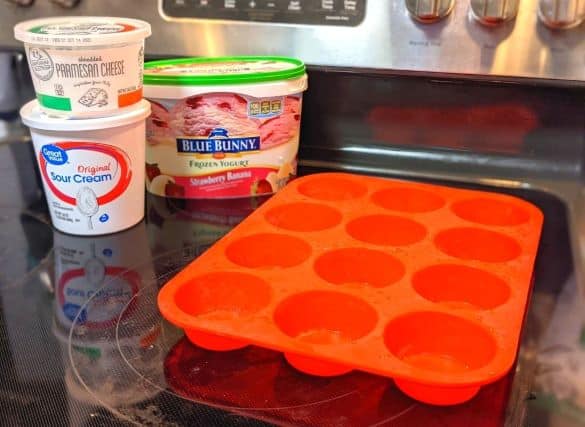
Whatever container you end up using, just make sure the top of it is either the same size or bigger than the bottom. This is crucial so you will be able to remove the ice treat once you are ready to use it.
The size and even shape of the containers you choose will also depend on what you’ve decided your main goals for this food enrichment will be. If the ice treats are for a special occasion, have fun and pick a mold shape that matches the theme.
As zookeepers, we would make popsicle cakes for animals on their birthdays and holidays. When we make them for our pups now, we use large old yogurt or ice cream containers to make sure that they are big enough to put larger treats and toys in them.
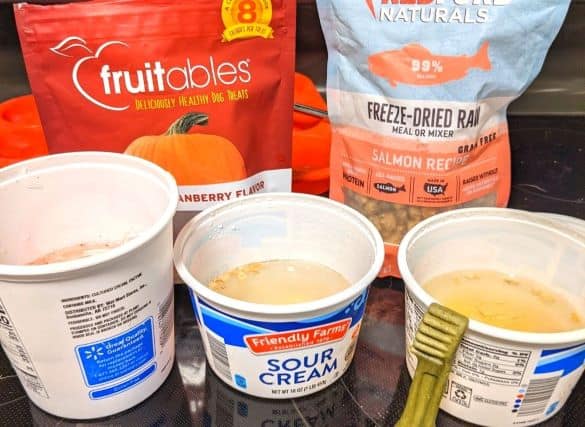
Larger-sized containers and molds typically work better if you want to hide ‘surprises’ inside your pup’s popsicle. They also will keep your dog occupied for longer than a smaller ice treat would.
When picking your containers, you should also take into consideration the size and personality of your dog. Frozen treats can potentially be choking hazards so you will want to make sure you select the proper size for your pup.
Step 3: Pick the Main Flavor Base for Your DIY Frozen Dog Treats
The main flavor base is what most of your dog’s ice treat will be made of. You can use plain water, fruit puree, watered-down broth, or coconut oil for extra flavor. Just make sure that any broth you choose is either low-sodium or sodium-free as too much salt isn’t good for dogs. High amounts of sodium could cause vomiting, nausea, or diarrhea. It can also worsen their conditions if they have any type of liver, kidney, or heart disease.
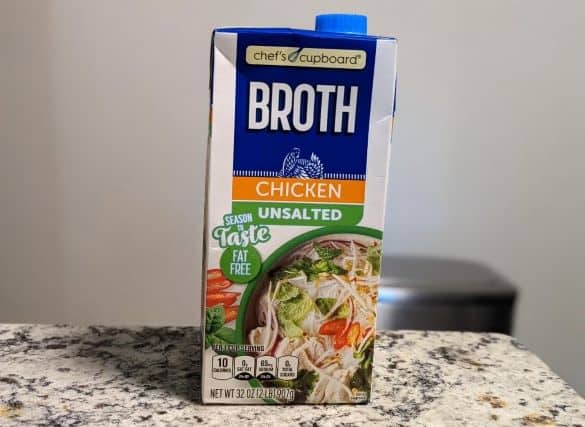
Feel free to get creative with your flavor base! Not only can you mix them together and play with the ratios, but you can also layer them throughout your ice treats. Alternate the layers with different flavored broths or switch back and forth between fruit puree.
The trick to layering different flavors is to make sure the layers are completely frozen before adding the next one. This is especially important if you are adding food coloring to each layer to make it more festive or want to space out any special treats throughout the ice treat. Switching up the flavors throughout your dog’s popsicle can help keep them engaged with it for longer.
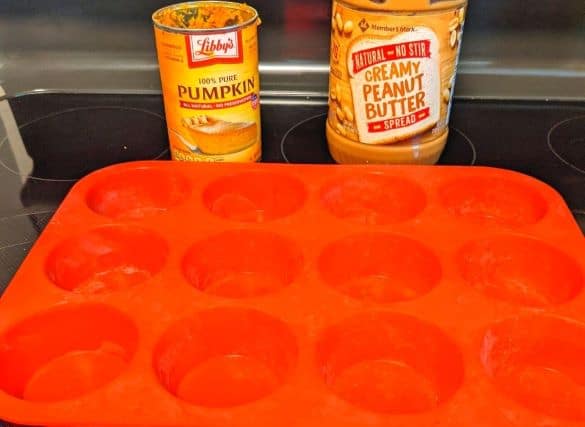
You can also create an ice treat that is more similar to doggy ice cream by using yogurt as the main flavor base or even filling a bone or Kong-type toy with yogurt filling and freezing it.
Step 4: Select Any Special Toys or Treats for Your Dog’s Frozen Ice Treats
It’s time to decide if you want to put anything extra inside your dog’s popsicle! This step is optional since even just a simple ‘plain’ ice treat is enriching and will do the trick. If you do decide that you want to put a few surprises in their popsicles you can use a variety of toys, treats, and chews.
Anything that you choose should be able to be safely frozen and thawed. This is important because the freezing process could affect the durability and texture of certain toys and chews. It will also change the texture of any food you use.
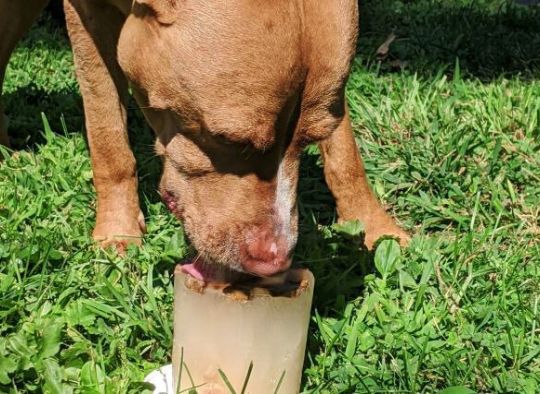
You can select simple items to use like balls or get toys that are specifically designed to be frozen. As for food, there’s no end to what you can use in frozen dog treats. Pull out their favorite biscuit or experiment with dog-safe fruits and vegetables. We recently bought a juicer and have discovered that the leftover ‘guts’ work great in our dogs’ frozen treats! You could even use small amounts of things like bacon bits, peanut butter, or canned pumpkin.
No matter what type of food you pick, you will want to double-check that it’s ok to feed your pup. Check the ingredients for hidden dangers like xylitol (found in many sugar-free items) and that they aren’t too high in things like sodium and salt.
One thing to keep in mind when you are adding treats and toys to your homemade dog popsicles is that a lot of these items might float. This means that if you want them frozen throughout the treat or completely submerged, you will have to freeze them in layers. This will give you greater control over the placement of the extra surprises you use.
Step 5: Creating Your Homemade Dog Popsicles
Now that you’ve picked out your containers, flavor bases, and any special treats or toys to create the perfect frozen dog treat to meet your goals, it’s finally time to make it. This step may be super quick if you’ve decided to make a simple one-layer ice treat, or it may take several days if you are freezing a larger dog popsicle with multiple layers.
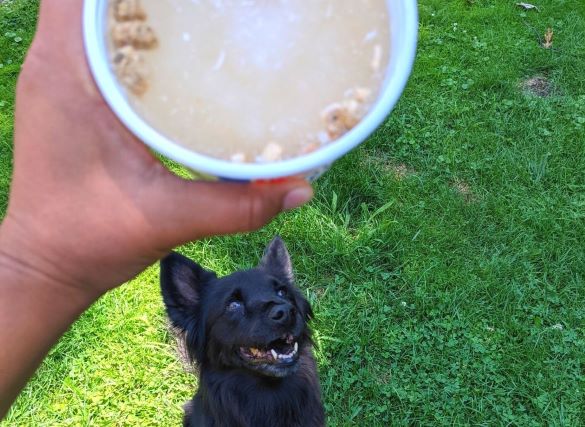
No matter what you end up choosing, I recommend making multiple kinds of frozen dog treats at once. This will not only help save you time, but it will also cut down on waste. We typically end our frozen treat sessions by finishing up with a few ‘trash’ dog popsicles. These are ice treats that are made from the leftovers we have so nothing goes to waste.
Making multiple types of frozen dog treats will also allow you to have more options to choose from so your dog doesn’t get bored getting the same one every time. There is also a chance that they may not like a particular flavor or texture so having a variety ready to go will help you learn what your dog does and doesn’t like in their popsicles.
Step 6: Freeze and Store Your Frozen Dog Treats
The last step in creating homemade dog popsicles is the final freeze and storing them safely until you are ready to hand them out. You can tell when your dog popsicles are fully frozen when there are no more moving bubbles inside. This won’t be as important to watch for during the layering process, but it is crucial when you take out the popsicles to store or use.
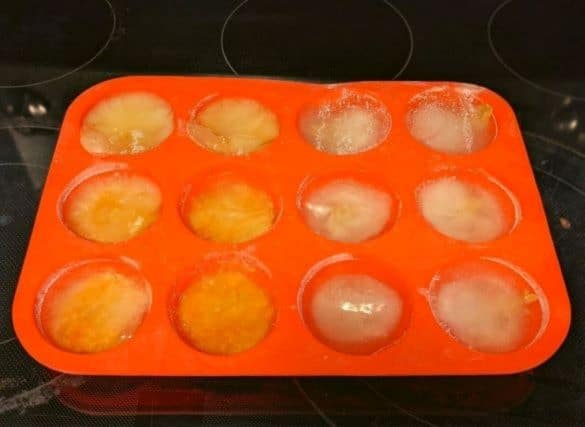
If you try to take the frozen dog treats out before they are fully frozen it can make quite a mess spilling ice-cold liquid all over you and the floor. And yes, I’ve done this several times and it’s NEVER fun.
Since it’s easiest to make a lot of dog ice treats at once, you will want to make sure you store them properly. Make sure you store them in bags or containers that won’t let the air in causing freezer burn. This is why I love using old yogurt and sour cream containers- they all come with lids!
Frozen Dog Treat Safety
I love creating homemade popsicles for my dogs, but like most things, there are several things to be aware of so they can enjoy these treats safely. Most of these items are mentioned in the sections above, but to make it easier- here’s a quick list of things to keep in mind:
- Double-check that all foods and ingredients are safe for dogs.
- Take into consideration the calorie count of the treats for your pup especially if you are concerned with their weight. You may need to adjust their normal diet on the days they get homemade popsicles.
- Make sure all toys, chews, and treats will be safe during and after the freezing process.
- Monitor your dog with the ice treats. As they consume the treat, watch for choking hazards and sharp edges. If you see something that makes you concerned, take the popsicle away from them until you have fixed the problem.
- Make sure they aren’t biting the treat excessively. This could lead to cracked or broken teeth. If this becomes an issue, you should re-think the size or shape of the dog popsicles or you can give them to your pup after they have thawed out and softened a bit.
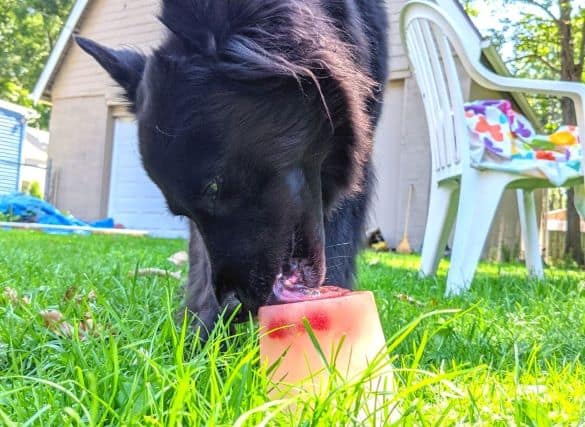
As you and your pup experiment with all the different types of frozen dog treats, take note of how much (or little) they liked the different popsicles. Don’t be discouraged if they don’t like something. There are tons of things to try until you find out what they prefer.
Get Started Making Your Own Frozen Dog Treats!
Fill your freezer with bark-a-licious homemade dog popsicles and say goodbye to hot, bored, and grumpy pups this summer! Making your own dog treats is a great way to save money and still spoil your furry friends. The best part is that you can easily customize your pup’s frozen treats with all their favorites and really get their tail wagging on holidays or special occasions. Dog popsicles are my go-to food enrichment when my dogs are playing outside on nice, sunny days- will they be yours too?
Pin For Later:
Amazon and the Amazon logo are trademarks of Amazon.com, Inc, or its affiliates.


Oh my goodness my pups will love these! I can’t wait to give this recipe a try!!🐾❤
Ours love them! We need more containers LOL
These fur babies look like they are enjoying their cool summertime treats!
They do enjoy them- as long as there aren’t blueberries in them LOL
Just pinned this! My doggos would love popsicles! (They eat anything and everything, mind you)
Let me know how it goes when you try it!
What a great idea. I can only imagine the joy a dog would have getting to the treat in the middle.
Thanks! They especially love bacon bits!!!
This is such a great idea! I’ll have to try this this summer. I love the tip about using empty yogurt containers. 🙂
I’m all about the Re-use in the 3Rs 🙂
Such great tips to create nutritious snacks to keep your pups cool in summer! I have molds for dog treats and have been toying with the idea of frozen snacks, thank you for the information!
Hope your dogs like them! We like to switch these up with homemade dog ice cream
Oh my goodness! I know my dog love this! Great tips! Thanks for sharing love!
Your welcome! Enjoy!!!
This is such a great idea! My girls will love doing this as a project – thanks!
Family project time- Yay!!!
I’m going to try these for Ella! Such a great idea.
Thank you! Have fun 🙂
Oh my gosh what a cute idea for pups in these warm summer months!
Thanks! I love giving them ‘new’ treats 🙂
I bet my old man would love these! Thanks for sharing your recipe.
You’re welcome- hope he enjoys them!
Wow, I’ve come across so many uber-dedicated dog mom’s lately! I would not make a good dog owner – I’m way too lazy. Your dog is one lucky guy!
LOL…thanks! These are quick and easy to make (we did them all the time for the animals at the zoo)
This is amazing Tiffany! We don’t have pets at home but my parents own a dozen and I can’t wait to share this info to them. I’m pretty sure our dogs will love it especially during hot days. It’s a perfect treat!
Aw, thank you! If you have cats, you can make cat versions with wet food and tuna also 🙂
I love doing this for my dogs, because they love it so much.
And it’s so easy to do!
Great idea for enrichment and snacks. I bet dogs LOVE these!
They do! You can make versions for most animals which can be even more fun 🙂
What a COOL idea! Lol! I would definitely consider doing this if I had a dog!
It works for a bunch of different animals 🙂
I don’t have a dog anymore, however she would have loved these treats! And what a great idea to freeze surprises inside.
It’s fun watching them when they get to the surprise!
They look amazing although Miss Picky am not sure if she would eat them will have to try make one and see what happens. The only thing that worries me is the tuna as canned tuna can contain mercury so I do not give it to her although she loves it.
DIY popsicles are great because you can pick and choose what treats (if any) you want to put in them 🙂
Great and easy recipe idea! I especially like the “surprises”. I’ll for sure make these for my pup. Thanks for sharing!
Thanks! It helps keep our hydrated dogs as some of our dogs don’t drink plain water when they get hot. The surprises keep them motivated! LOL
We are at the tail end of a heat wave here – something like this would be an awesome way to help my pups keep cool! My only hesitation is that I’d want them to eat it outside to avoid a big mess indoors, but I usually try to avoid giving them food outside because if they leave any food smells behind it attracts bears. The joys of living in the woods, lol.
I’ve put the ice treats on huge baking pans if they get them inside to help with the mess. I can’t imagine having to worry about bears with left over treat scents outdoors!
Oh wow. What a great summer dog treat. Hydration is vital for our dogs and cats in Summer!! I love the ‘surprise’ motivation to keep them wanting more.
A lot of times that special treat is the only thing that keeps them involved with the ice treat after the first few minutes…LOL
Pinned this! This is a great idea for dog moms, especially during this heat wave!
Thanks! We try to keep these and doggy ice cream on hand to battle dehydration on hot days 🙂
I love making treats for my guys, and popsicles are a summer fave! I never thought of adding treats as surprises; I LOVE that idea. Thank you. Jack is recovering from dental surgery, so I will have to wait a bit before I give that a try
I hope Jack heals quickly!
Yum, yum, yum! The dogs must really love these. I hadn’t thought about layering frozen treats. That’s a great idea! I can imagine my cats enjoying something like this too – with tuna or with chicken broth. Who doesn’t love a cold treat on a hot summer day?!
Exactly! We’ve put cat treats inside frozen treats for a ‘surprise for our feline friends 🙂
As a southern California resident frozen treats are a MUST in our house! I’m a huge fan of “hidden veggie” frozen treats – I often throw in some broccoli, spinach or kale into ours. Sometimes I’ll be lazy and just double my smoothie recipe (without added protein powder/sweeteners) and freeze it into little molds for the dogs (or spread it on a licki matt!).
We do carrots in ours! We found that they are more likely to eat frozen veggies than fruits in the popsicles
Home-made frozen goodies are awesome treats, especially in the summertime. With my dog, I can get away even with things she wouldn’t eat unless frozen, such a veggies.
That’s a nice way to sneak her healthy treats!
What a great idea! I have to wonder if they have cat popsicles, but probably not, as cats don’t really like cold water or food. They like things at room temperature.
We’ve made cat popsicles too and some cats love them. It’s always worth a try!
We make homemade popsicles like this for our pups and they go CRAZY over them. The biggest favourite in our house is frozen yogurt, so we usually go that route for a base and either freeze it as an individual popsicle or stuff their Kong toys, with fruits/veggies, kibble or dog treats in them. I have never thought of using balls of peanut butter but we have one dog OBSESSED with PB so I might have to do that for him with the next one!
We usually use the left over broth from when we cook, though we’ve done yogurt a time or two 🙂